With the weather getting warmer and our gardens beginning to brighten it’s the perfect time to build a flower through creative play. Today for this Air Dry Clay Flower Craft we’ll be combining two of my favorite and most versatile art materials: pipe cleaners and Crayola Model Magic or any similar air dry clay.
The simple and repetitive process of pushing a pipe cleaner into clay can be satisfying and calming for young children of all ages and abilities. This creative play activity will also introduce/reinforce pattern development, textures, clay building skills, and is ideal for fine motor skill development. So let’s have a seat outside in the garden, gather up some art materials and PLAY!
Creative Play with Air Dry Clay: Build A Flower

FIND EVEN MORE FLOWER THEME ACTIVITIES IN OUR FLOWER THEME LESSON PLANS.
The Role of Creative Play
Creative play is all about children exploring, experimenting, and discovering in a relaxed environment. It focuses on self-expression, imagination, and learning through doing. The importance and benefits of play should never be overlooked.
Play is vital to childhood development and a great way to strengthen problem solving skills as well as social skills. It fosters creativity and self-discovery while enabling one’s imagination to blossom.
Sadly in many classroom settings creative playtime has been reduced and/or undervalued. Let’s appreciate and celebrate the magic of play and all of its benefits!
Air Dry Clay Flower Craft

Supplies
- Pipe Cleaners
- Crayola Model Magic or Air Dry Clay
- Green Jumbo Straws
- Construction Paper
- Scissors
- Hot Glue Gun (for adult use)
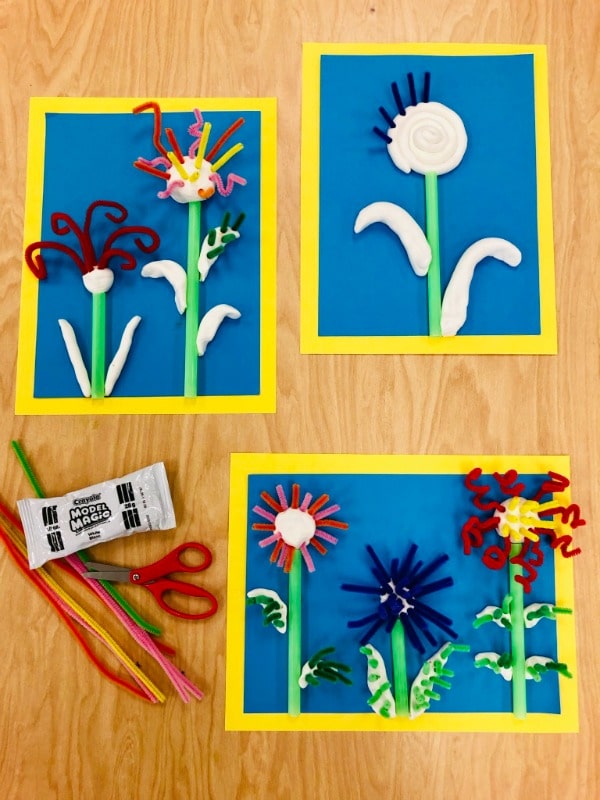
Step By Step Directions

Clay Building
Begin by giving your child a small amount of Model Magic to see how they react to the texture of the clay. How do they start to manipulate the clay on their own without direction? Next, ask them to make a ball out of the clay and model the technique if necessary by molding the clay in your hands in a circular motion. Next, use another piece of clay to roll a coil. Model this by using your hands as a rolling pin. Collect up the various balls and coils while adding straws into the mix.

Build the Flower
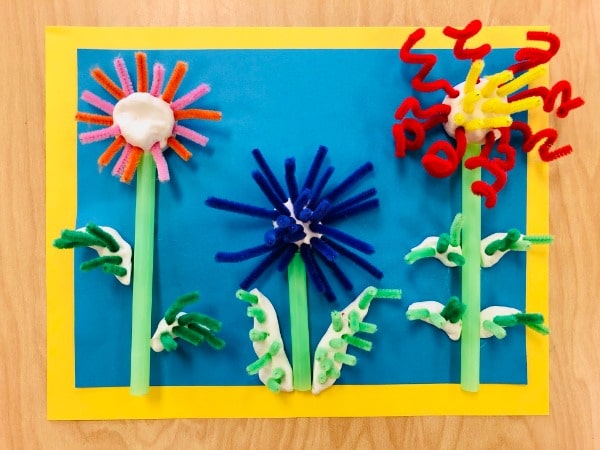
Set up the flowers on the construction paper. Let your child play through this process by exploring the placement of the materials to form the flowers. Encourage them to move the materials around the paper. Feel free to cut the straws into different lengths. They can be used as the stems of the flowers. The balls can be used as the center of each flower and the coils can be used for the leaves. Or maybe your child will come up with another interpretation. Seeing what your child creates is half the fun!
Hot Glue
Once your child has completed setting up the flowers, turn this creative play activity into a keepsake by hot gluing the straws and clay onto the construction paper. Just a small dab of hot glue is all you need for the clay and straws to stay in place.

Add Pipe Cleaners
Finally, let the poking and pushing begin! The pipe cleaners will represent the petals of each flower. Let your child pick the color of the pipe cleaners they wish to use. Would they like to create a color pattern? Do they want to create a realistic flower from your garden or create an imaginary one? Cut the pipe cleaners into various lengths. Now your child can work each piece of pipe cleaner into the clay. Next, use green pipe cleaners to add color to the leaves as well. Over the next week the Model Magic will dry out/harden and the pipe cleaners will be secured into place.
Extend the Activity
Talk About Texture:
How does the clay feel in your hands? How do the pipe cleaners feel? Introduce the word texture to your child and have them describe how the art materials feel. Are they rough, soft, fluffy, prickly, hard, smooth, or bumpy?

Art and Literacy:
I recommend the book Planting a Rainbow by Lois Ehlert as a literary companion to this lesson. Through beautiful illustrations this book details the process of a flower’s growth from bulb or seed to fully developed flower. It also identifies an array of flowers by name and sorts them by color likeness.
Art and Science:
These questions can extend this creative play activity into a quick science lesson.
- Identify the parts of a flower. Can your child point out the leaves, stem, petals, and seeds?
- What does a flower need to grow?
- How many different types of flowers can you find in your garden?


I hope your child enjoys this creative play activity. It’s nice to sit back and observe your child during play to see how he or she reacts, adjusts, and manipulates the materials.
CONNECT WITH VIN GIANNETTO
Learn more about Vin here on his author bio page. Follow along with him on Facebook at Young School Art with Mr. Giannetto and on Instagram @youngschoolartwithmr.g for art project ideas.
More Art and Craft Project Ideas from Vin
Fun Spring Art Projects for Kids
Click on the images below to see the full tutorial for each art project.
More Flower Theme Activites
Visit the flower theme planning guide for more hands-on learning and playful activity ideas.




Leave a Reply