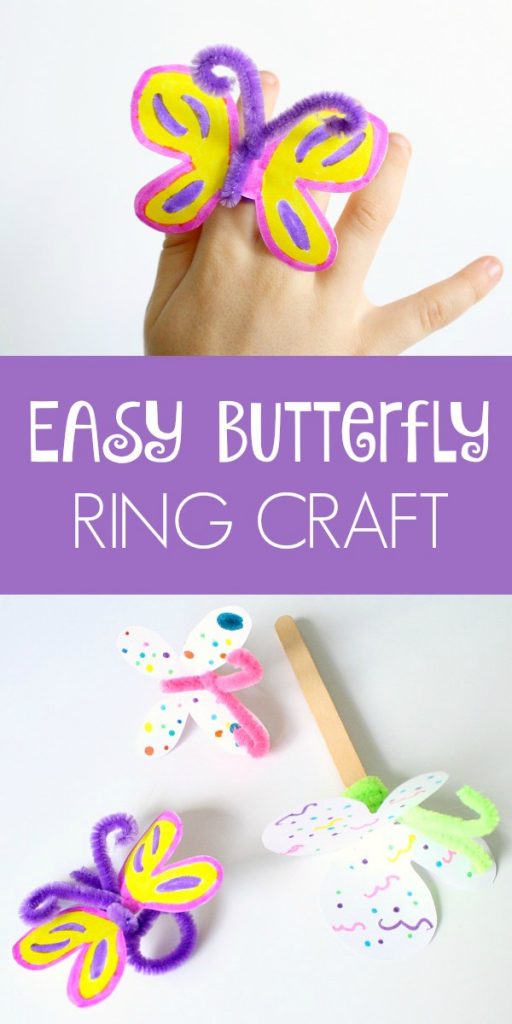
When we have a little extra time after school my oldest daughter and I like to doodle. One day we were sitting at the table drawing butterflies, and she said “I wish we could make these fly.” I said, “Let’s give it a try.” So we took a little time to make this easy butterfly craft that can “fly”…well sort of.
In addition to a fun after school craft, these can also be used in the classroom or at home for pretend play and to act out butterfly songs and rhymes.

How to Make Your Own Butterfly Craft
To make your own start with small squares of paper (approximately 3 inches by 3 inches. Limiting the paper size saves paper and also helps keep the butterflies small enough to make a ring that won’t be too big for the child’s hand.
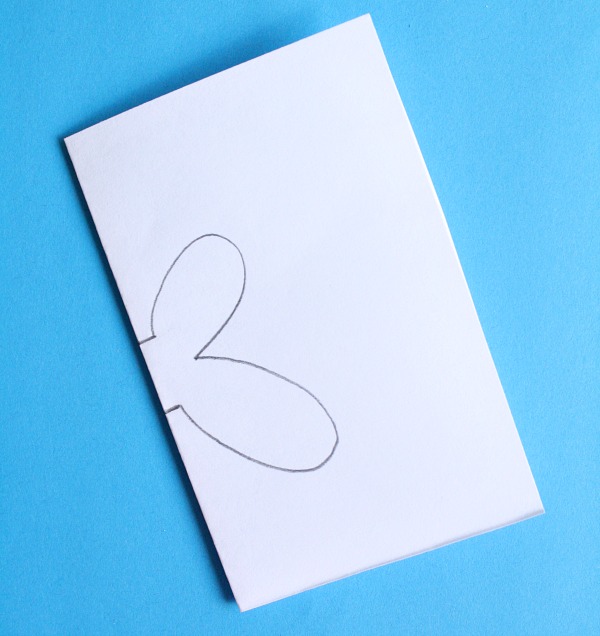
Fold the paper in half. On the side with the crease draw two lines about 1/4 inch long. This will make the part of the butterfly that will lay on your child’s finger so the width should be small enough to fit the child.
Then draw a large B or similar shape to connect the two lines and make half of a butterfly shape. If you model this process for them first, older preschoolers and school age kids can do this on their own, and you’ll have lovely unique butterfly shapes.

Leave the paper folded and cut along the lines to create your butterfly shape. Unfold the paper and decorate with markers, colored pencils, or crayons.

We chose to turn some of our butterflies into rings and some of them into popsicle stick crafts.

For the rings, you’ll need a chenille stem. Start by make a loop in the middle of the stem that is the appropriate size to fit your child’s finger. Then twist the long ends gently around the middle of the butterfly craft leaving the long ends out at the top of the butterfly. Twist those long ends and then curl them to create the antennae, and you’re done! Put the ring on then soar around the room our outside.

To make the popsicle stick version you’ll need two popsicle sticks, glue, and a chenille stem. Start by folding the butterfly in half and placing glue on the center part that would have been on the child’s finger. Pinch that part between the two craft stick ends and hold for a few seconds as the glue sets to secure it. Wrap the chenille stem around the craft sticks just below the butterfly. Then twist it and pull the ends through the front of the butterflies wings and curl them to make the antennae.
This version makes great puppets for making up stories or singing and dancing along to learning songs.

Get a Full Week of Butterfly Theme Learning and Play
Save time and get right to the playful learning with our printable lesson plan sets. Each set includes over 30 playful learning activities related to the theme, and we’ve provided different versions for home preschool families and classroom teachers so all activities are geared directly toward your needs.
In this 248-page comprehensive preschool butterfly theme lesson plan pack kids learn about the life cycle of a butterfly during a full-week (or more!) of playful reading, math, and science activities. Vivid photographs are included throughout the unit so children can see real life examples of caterpillars and butterflies. Watch this short video to see just a few examples of the types of activities and printables included in this set:
This set includes active hands-on learning ideas and the following printables:
1) Butterfly Life Cycle Roll and Graph Game
2) Butterfly Life Cycle Roll and Graph Game
3) Caterpillar Uppercase Alphabet Cards
4) Butterfly Lowercase Alphabet Cards
5) Butterfly Life Cycle Cards
6) Butterfly Symmetry Matching Cards
7) Butterfly Life Cycle Word Building Mats
8) Caterpillar Measurement Recording Sheet
9) Caterpillar Patterning Activity
10) Caterpillar Syllable Sort
11) Caterpillar Egg Leaf Counting Mats (Numbers 1-10)
Get Your Lesson Plans
Home Preschool Butterfly Theme Lesson Plans
Preschool Classroom Butterfly Theme Lesson Plans


Leave a Reply