It isn’t snowing here in Florida but we did have our first cold snap. All the winter coats, hats, and gloves have my little ones daydreaming of snowflakes, so I decided we’d try a new snowflake art project. One afternoon after school we decided to make some snowflakes of our own using the classic marble painting technique we’ve used before to make fish art.

We used paper to make our snowflakes, but you could also use coffee filters. I wasn’t sure how the lightweight coffee filters would stand up to the shaving cream mixture.
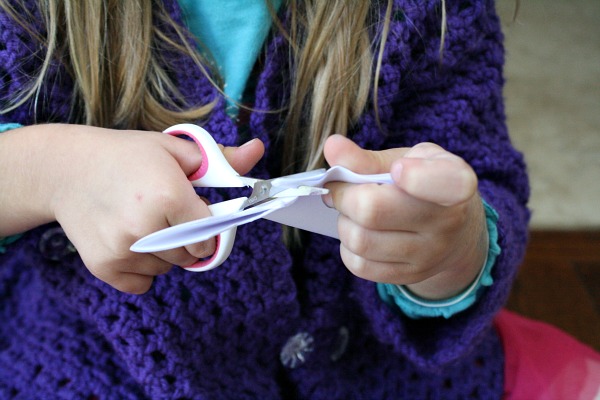
If you’ve never made paper snowflakes follow these simple steps to get started.
- Fold paper square in half, then in half again. Fold a third time diagonally so you have a triangle. (see top 2 pictures below)
- Cut designs out of the triangle sides (see bottom left picture)
- Unfold to reveal snowflake shape (see bottom right picture)

Cutting snowflakes is great fine motor practice, but it’s hard work for little hands. They may need some help, or they might like taking breaks in between cutting. We worked as a team to cut a variety of shapes and sizes.
(affiliate links)
Then we sprayed shaving cream into a large glass baking pan (any washable tray will work). Choose your coloring based on your own preferences. You may already have liquid food coloring or gel food coloring, and those work well. However, they aren’t washable so you’ll need to be careful to wear play clothes. Any coloring on hands will wash off after a bit. If you prefer a washable method then liquid watercolors are your best option.
We had some neon gel food coloring on hand, so we used that. We started with just two colors to avoid making a big batch of black or brown snowflakes.

After squirting pink and purple around on top of the shaving cream Lovey used a fork to gently mix the colors around. This adds to the blending and marbling effect. Next Lovey pressed one snowflake onto the mixture at a time making sure all parts of the snowflake were touching the shaving cream. Then we peeled them off and placed them on a piece of cardboard. There we used a spatula to scrape the extra shaving cream off the snowflake and place it back in the baking pan.
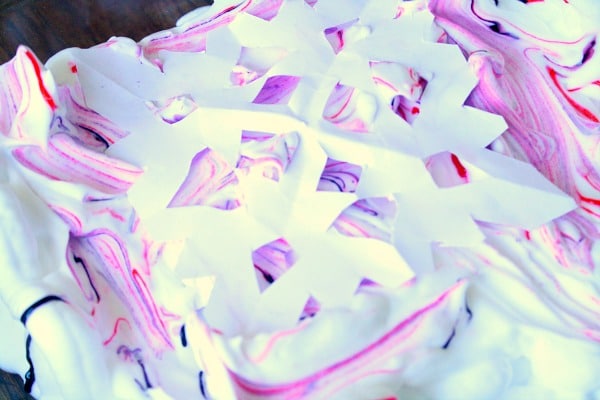
Lovey was especially proud of this snowflake. We ended up gluing it to paper and adding some snowflake confetti around it. These would also make a beautiful wall display to brighten up the indoors on cold winter days.

Although this craft is fun to do on its own, there are also a variety of ways to incorporate additional skills.
- Read a favorite book about snow and snowflakes.
- Get writing with a writing prompt. Lovey and I talked about what color she would make snow if it wasn’t white and why. For young learners you can record their responses and display it next to their snowflake. Older writers can create their own short writing in response to the prompt.
- Add some bath by examining the shapes made within your snowflake and looking for the lines of symmetry.
- Practice color mixing with by using two primary colors in your shaving cream mixture.
- Learn about the science of snowflakes with these cool videos.
Get a Full Week of Snowflake Fun and Learning
Save time and get right to the playful learning with our printable lesson plan sets. Each set includes over 30 playful learning activities related to the theme, and we’ve provided different versions for home preschool families and classroom teachers so all activities are geared directly toward your needs.


Use snowflakes as inspiration for a week of learning and play with this preschool snowflake theme lesson plan set full of hands-on math, reading, and science activities. Watch this short video to see just a few examples of the types of activities and printables included in this set:
Leave a Reply