We had so much fun painting with water shooters earlier this summer, that we’ve been dying to try another water shooter activity. When I learned about this sponsored post opportunity for the campaign, I knew this water shooter tie-dye project would be perfect!
I had never tie-dyed before trying this project, so I was a little nervous at first. But after receiving our tie-dye kits, I can totally understand why One-Step Tie-Dye is America’s favorite tie-dye. The kits made it so easy. Aside from choosing the fabric we wanted to tie-dye we could have made multiple projects with only the supplies provided. However, I did add in a couple of items so that we could do our water shooter tie-dye version.
Supplies
- One-Step Tie-Dye Kit~There are a few different versions available. We used the one pictured below.
- Water Shooters~One per color
- Fabric to dye~We chose to dye sheets this time.
- Clothespins

Steps
1. Prepare Your Fabric
After washing our sheets without fabric softener, we looked over the helpful Project Guide provided in our One-Step Tie-Dye Kit. It includes tips for trying different tie-dye techniques. The girls and I decided which techniques we were going to try for this project.
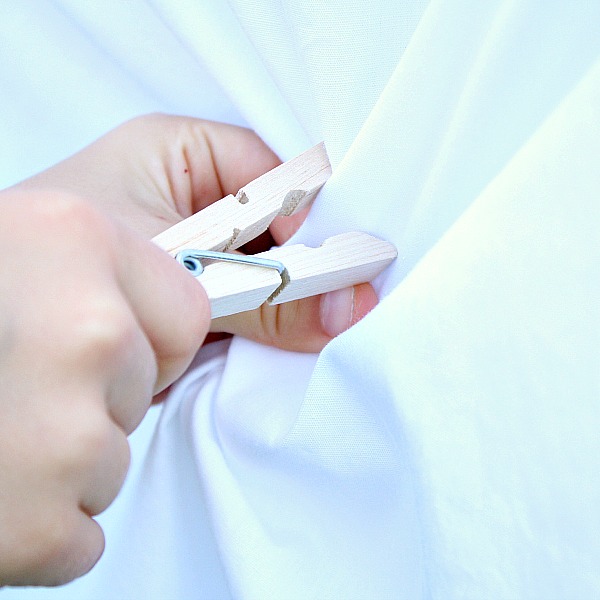
Lovey wanted to try the folding technique, so we folded her sheet into quarters. Then we used clothespins to hang it to our fence outside. Be sure you secure your fabric to a surface that will not be stained by the dye. You could drape it over a wire or PVC frame if you want a vertical surface. Otherwise a plastic sheet on the ground will also protect your surface.
We also clipped some extra clothespins around the fabric to create an additional design in the final masterpiece.
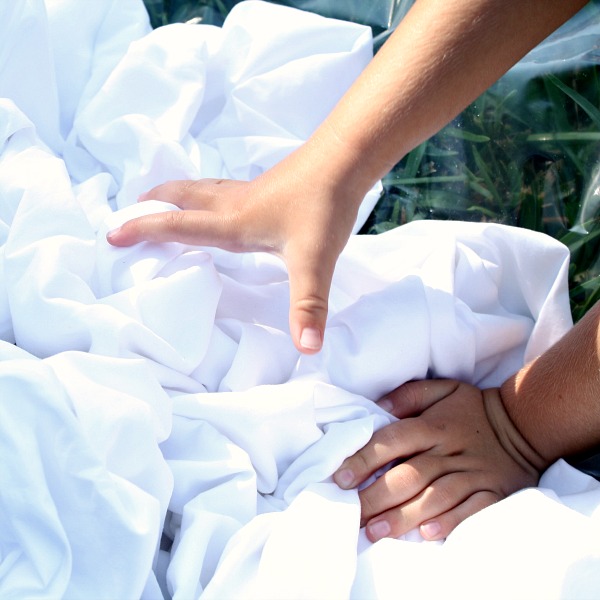
Tinker chose to work on the ground, so we used the crumple technique for her project. After placing the protective plastic sheet provided in the kit on the ground, she pinched and scrunched the sheet together.
2. Prepare Your Dye
Our kit included both powder packets and bottles with pre-measured powder. To use the bottles, you just add water for bold, beautiful color. It’s super easy! We also used the powder packets and mixed them in buckets so we could easily dip our water shooters in to fill them.
The amount of dye in the kits and the quick prep time make them great for large scale summer projects like summer camp, VBS, summer preschool c0-ops and play dates.
3. Dye Your Fabric
Then get ready for the real fun to begin! It’s time to dye your fabric.
Lovey had a ball spraying the dye onto the fabric with her water shooter.

Water shooter tie-dye was also easy and fun for Tinker who is 3. She could easily fill and spray her water shooter to dye her own fabric.

We flipped Lovey’s sheet around in the middle of dying so she could be sure the dye saturated all of the farbic. This is a final picture before we wrapped it up to let it sit.

This is a picture of Tinker’s crumple version before we wrapped it up.

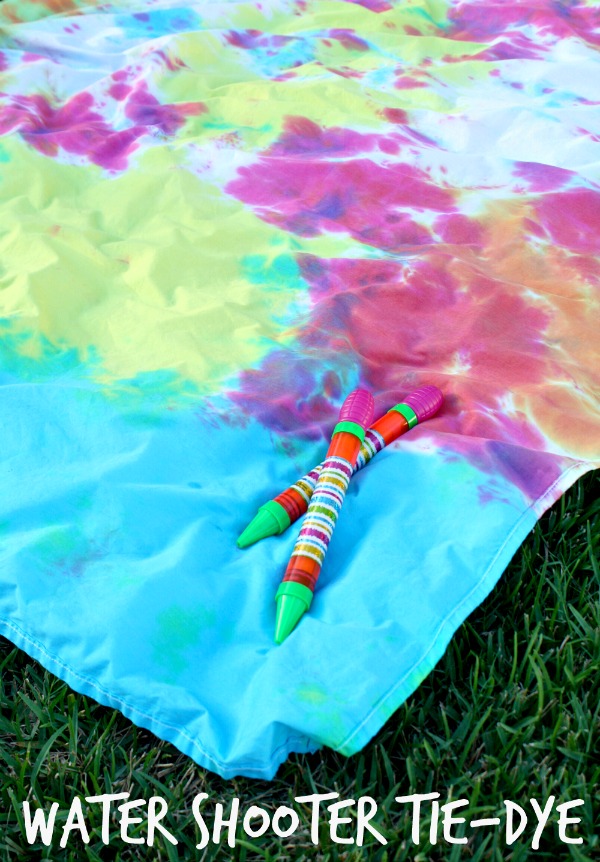
Both of the girls are thrilled with their finished tie-dye sheets. The dyes are permanent and color-fast so they won’t fade in the wash, and I know they will come in handy for all sorts of summer fun.


So far we’ve been using them as picnic blankets, a cozy spot to read outside, and for making indoor forts.

No matter what you’re making, you’re sure to have a memorable keepsake that kids and families will remember making together for a long time to come.

Learn more about crafts and products from I Love to Create on their blog, Facebook, Twitter, and Pinterest.
jjackie
Where did you get the water shooters? This is a great idea!
Shaunna Evans
We find ours at Dollar Tree, but I also see them at Walmart and other retail stores during the summer months.