Kids of all ages will love creating their own paper sculpture relief ocean craft…and you’ll only need a couple of everyday supplies!
Paper. I’m sure you have an array of colors, sizes, weights, and types piled up in your craft room just quietly waiting to be used. Oftentimes, paper is overlooked and under appreciated when more exciting art materials such as paint, clay, or the almighty glitter are readily available.
I’d argue that paper can and should be the star of the show! It’s truly one of the most versatile and inexpensive art materials around!
Paper is very easy to manipulate by folding and curling. As a result, 2-D paper can be transformed into a paper sculpture relief. This process can engage and excite children just as much as those flashier materials.
Today we’ll be using this process to create an ocean craft. Folded papers will be transformed into fish, seaweed, sand, and even coral. So, gather up some paper and let’s get started!
Paper Sculpture Relief Ocean Craft

Get a full week of ocean theme preschool lesson plans.
Creating a paper sculpture relief can be modified for all ages and ability levels.
Simple folds as well as more advanced folds can be explored and aide with fine motor skill development. Those little fingers are sure to get a workout!
Modeling the folding techniques can be very helpful. Perhaps take turns or fold hand-over-hand. This is a great opportunity to create art with your child.
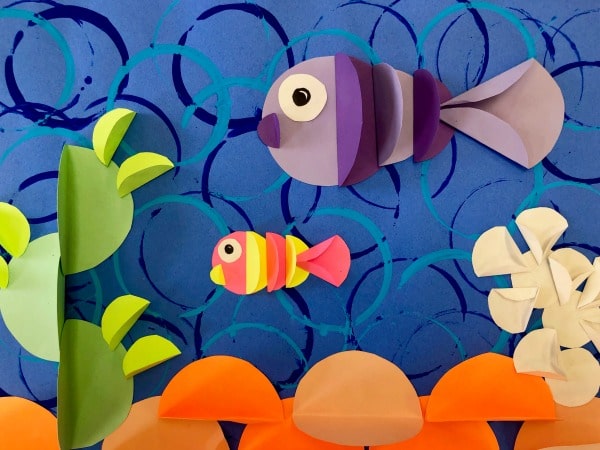
The folded paper shapes will be combined to create fish and other things found in the sea and glued to a flat paper background. Think of this process as raising the surface of the paper. As a result, the fish and such will be elevated above the flat paper plane. This creates a 3-D effect. The fish, seaweed, sand, and coral will appear to pop out of the sea!

Supplies:
- Construction Paper
- Scissors
- Pencil
- Glue sticks
- A variety of lids and paper cups
- Blue and white tempera paint
- Paint tray
- Sharpie
Step by Step Directions:
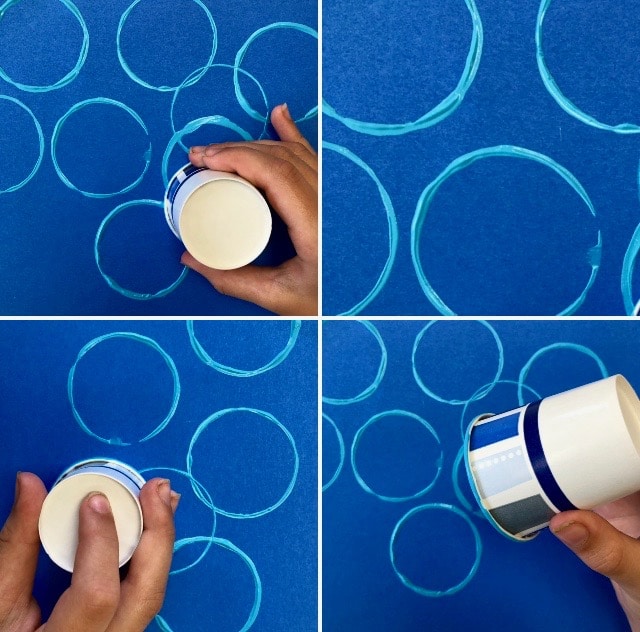
Step 1: Painting with a Cup
Begin by dipping the open end of a paper cup into a tray of paint and printing it onto blue paper. The results will be a beautiful array of circles.
Alternating between blue and white paint will make a nice ocean background. Also, printing with different sized cups is also an option. Overlapping various size circles will create interest and depth. Let the paint dry while working on steps 2 and 3.
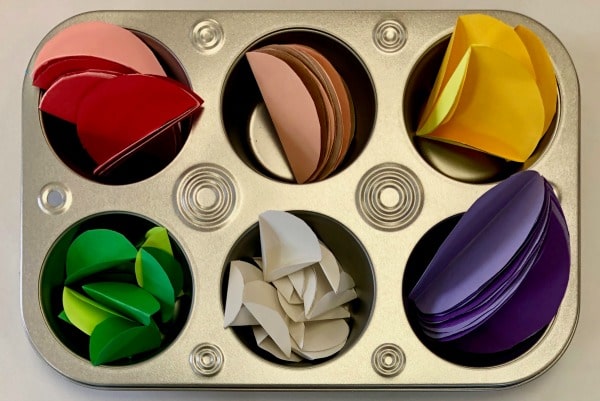
Step 2: Trace & Cut
Choose what color papers you would like to use for this project. If you wish to create a realistic ocean choose green for the seaweed, white for coral, and tan for the sand. Any colors would work nicely for the fish. Trace a variety of lids and cups onto the papers to create circles. These will be used to form the fish, seaweed, sand, and coral. Finally, cut out all of the circles.
For this project I recommend preparing 10-40 circles depending on your child’s age. If you’re working with a young child it will be helpful to have the majority of the circles precut.

Step 3: Get Folding!
Fold most of the circles in half. Make sure to make crisp folds!
Save a few circles to fold into fan shapes. This is done by folding in the right and left side of the circle to create a point at the bottom and a fan-like opening at the top.

Also, you may leave some circles unfolded as they can be used to create the head of the fish, part of the coral, or other parts of your project.
Step 4: Create & Glue
Begin by setting up your ocean scene. This is a playful activity and involves lots of trial and error.

Let your child move the shapes around the paper and see what works best. No need to copy an example.
Each ocean scene can be unique and one of a kind!
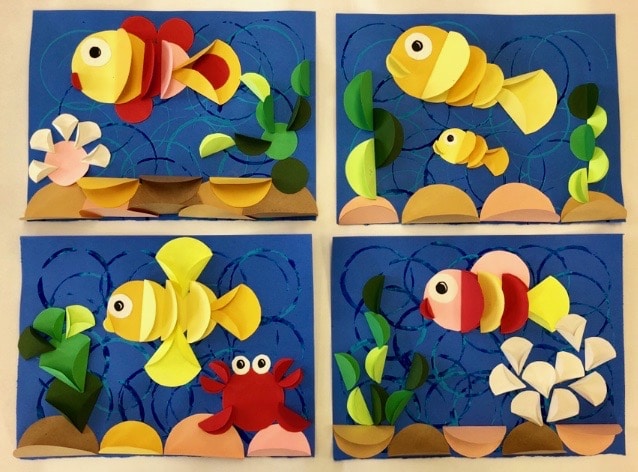
It’s a good idea to begin by setting up the sand at the bottom, followed by the seaweed and coral. Use the remaining pieces to create the fish.

If you wish, create a color pattern on the fish by alternating colors. Finally, glue each piece into place and use a sharpie to add eyes.
Talk About Art:
- How many circles can you find in your artwork?
- Can you identify a color pattern?
- How many living things can you find in your artwork?
- Where can you find repetition in your artwork?
Art & Literacy:
A nice literary companion to this craft is the book entitled Hooray for Fish! by Lucy Cousins. Filled with bright colors and patterns, the book introduces a diverse selection of fish. The bold and creative illustrations are sure to captivate and engage young readers.
I hope this paper sculpture relief craft was an enjoyable activity to complete with your child. Creating together can be a wonderful learning activity and paper lends itself nicely to cooperative art. I’m hoping this activity has you looking at paper in a new way!
CONNECT WITH VIN GIANNETTO
Learn more about Vin here on his author bio page. Follow along with him on Facebook at Young School Art with Mr. Giannetto and on Instagram @youngschoolartwithmr.g for art project ideas.
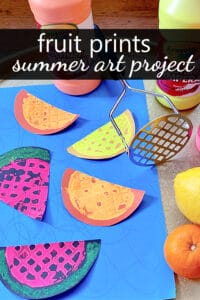
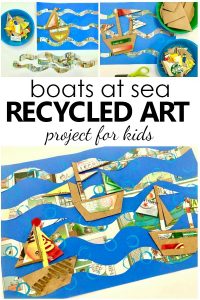
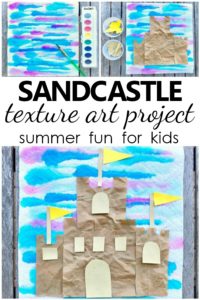
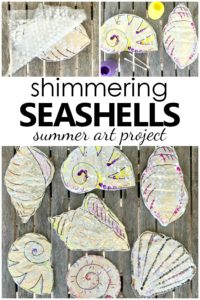
Fun Summer Art Projects for Kids
Click on the images below to see the full tutorial for each art project.


Get a Full Week of Ocean Theme Learning and Play
Save time and get right to the playful learning with our printable lesson plan sets. Each set includes over 30 playful learning activities related to the theme, and we’ve provided different versions for home preschool families and classroom teachers so all activities are geared directly toward your needs.

Watch this short video to see just a few examples of the types of activities and printable included in this set.
This set includes active hands-on learning ideas and the following printables:
1) Shark Dice Game (color and black/white)
2) Whale Dice Game (color and black/white)
3) Starfish Sorting and Patterning Cards
4) Ocean Letter Matching Puzzles
5) Ocean Life Number Cards 0 to 35
6) Ocean Family Counting Sets for Numbers 1-10
7) Sea Life Cards (for counting, patterning, and sorting)
8) Ocean Roll and Graph Game
9) Sea Life Word Building Cards
10) Sea Life Syllable Sort Activity
Get Your Lesson Plans

Leave a Reply