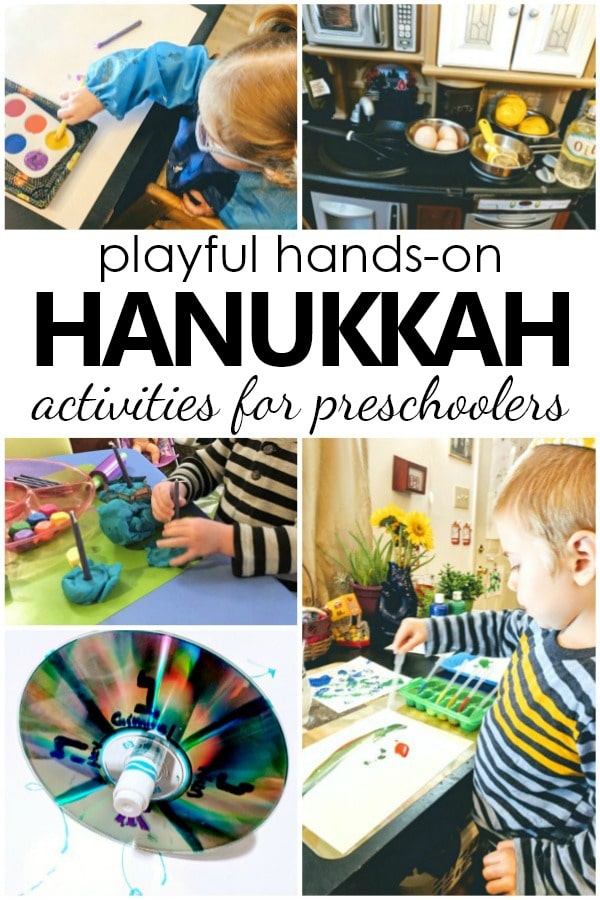
Hanukkah is a holiday filled with joy and light, and there are so many fun and meaningful ways to teach young kids about Hanukkah! Whether you’re looking for some fresh ideas to get ready for the holiday or some fun ways to celebrate each night, I’m excited to share eight great Hanukkah activities to brighten this joyous season! Get your candles and menorahs, your dreidels and your gelt and don’t forget the latkes and donuts. We’re about to have some Hanukkah fun with 8 great Hanukkah Activities for preschool!
Hanukkah Activities for Preschool

Dreidel Spin Art in Two Ways
Dreidel Spin Art With Paint:

Dreidel is a popular Hanukkah game. Children and adults alike enjoy the challenge of this game of chance as players take turns spinning the dreidel and determining by the letter it lands on, how much gelt is won (or lost).
In this art activity, you’ll need a dreidel or two (I’d recommend the plastic ones since they are easy to wash), some washable paint in your favorite color(s) and some paper and a recycled shoebox or foil pan.
Cut your paper to the size of the box or pan you are using if necessary and add a small blob or two of your paints.

Dip your dreidels and spin!
The results are colorful and it’s so exciting to watch the action! Allow your painting to dry and hold on to it–you’ll need it later on…

Make Your Own Recycled CD Doodle Dreidel:
For this activity, you’ll need a recycled CD or DVD, permanent markers, a washable marker (standard Crayola size is perfect) and some blank paper and a shoebox or foil pan.
To prepare your doodle dreidel, draw four sections across your CD with a permanent marker and add the Hebrew letters “nun,” “gimmel,” “hey” and “shin” in each of the corresponding sections.
Push your washable marker through the hole in the center of the CD until it secures in place. Gather some gelt if you wish and get ready to play AND doodle!
With paper prepared in your box or foil pan, you’re ready to take your doodle dreidel for a spin. As you play the game, your paper will be covered in fun little lines and designs.
You can save your paper at the end of the game for use in some of the other activities.
Oil & Watercolor Art

This is a great Hanukkah themed process art activity. You will need watercolor paints (I prefer to use liquid watercolors) and vegetable or canola oil from your kitchen (I prefer these to olive oil as the color is lighter).
I like to use an ice cube tray for the paints and oil.
Provide some paint brushes and a jar of water for rinsing the brush.
You may want to include a paper towel or rag for dabbing the brush dry between use as well. I would recommend covering your work space with a disposable tablecloth or newsprint and perhaps covering your artists with a smock as well.
Oil and watercolor art works best on a thicker paper, either watercolor paper or card stock. If you wish, cut your paper into the shape of a dreidel for a beautiful decoration or you can leave it as is and save the finished work for another project.
It may be helpful to set your paper in a foil pan or on a tray in case your artist is particularly zealous!
Art and science collide as children explore the beautiful and colorful results of oil resisting the watercolor paints.
Hanukkah Sensory Play in 3 Fun Ways
Oil, Water and Light Sensory Play:

Option A – Light Table Sensory Play:
I’m not going to lie, this one can get messy, but it’s oh so fun! You can set this up at a light table or using a tabletop light panel.
You will need a clear plastic basin to work in. I like a shallow file box for this purpose.
You will need oil (vegetable or canola are fine), water, and food coloring or liquid watercolors in your color(s) of choice.
You’ll also need squeeze bottles (you can recycle condiment bottles for this) or pipettes if you happen to have, and any plastic containers, test tubes or recycled containers you happen to have on hand for filling, pouring, squirting and exploring.
You may want to cover your space with a drop cloth and provide a smock for your children. Be careful in particular of oil spills on the floor as this can make the area slippery. I recommend using an old towel or sheet to cover and protect the area.
It is so exciting to observe colors mixing (or not mixing) as children mix, pour and explore with the colorful water and oil.
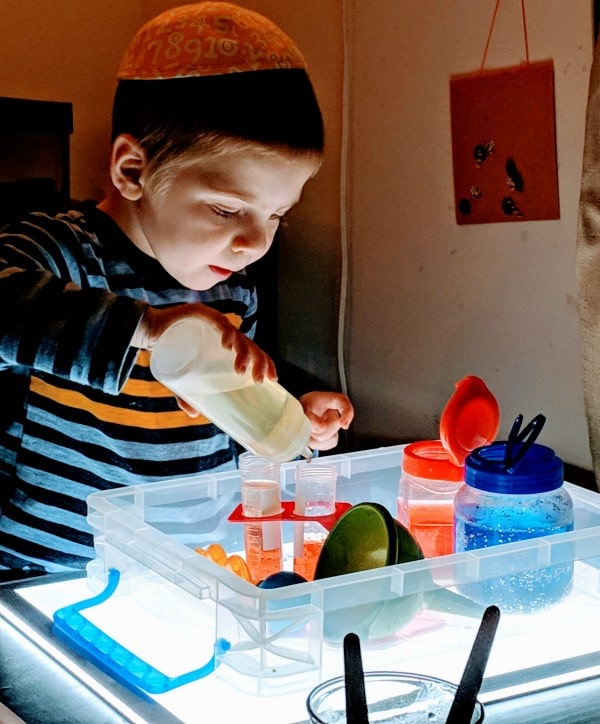
The element of light adds a whole new level of excitement while incorporating one of the most important themes of the holiday.
If you’re feeling super ambitious, you might even add in some glitter–hey, you’re getting messy anyway, right?
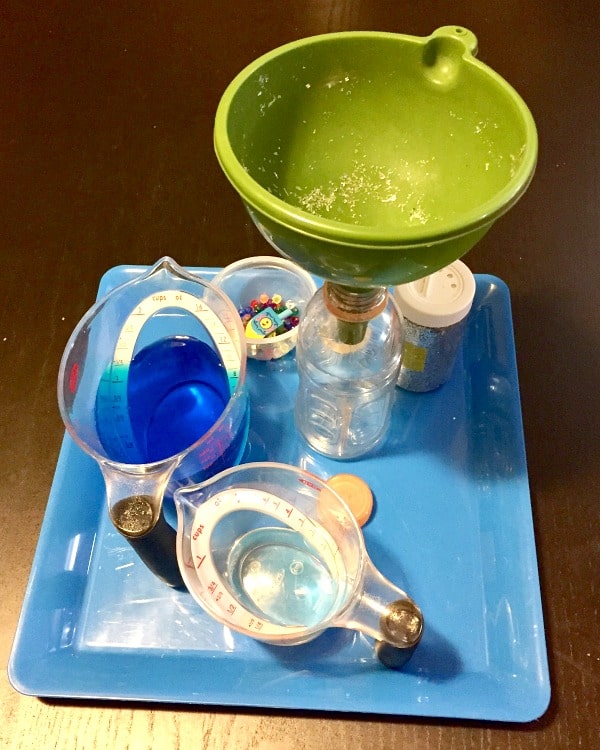
Option B – Oil & Water Hanukkah Sensory Bottles:
Ok, here’s the less messy compromise of the above activity, minus the light table (though you certainly can use it on one)!
This is also a great Hanukkah gift for the younger members of your family and older ones will love helping to make it.
You will need a recycled plastic bottle (I love the small G2 Gatorade bottles for both their size and durability).
You’ll also need water, food coloring or liquid watercolor in your favorite color, vegetable, canola or baby oil, a funnel, glitter, a small dreidel and any other small loose parts that can be submerged and sealed in the bottle (beads, sequins, etc.).
You’ll also need some duct tape and/or a hot glue gun to seal your bottle.
Add your colored water until the bottle is about 2/3 full.
Then add oil, leaving a bit of space to avoid overflow.
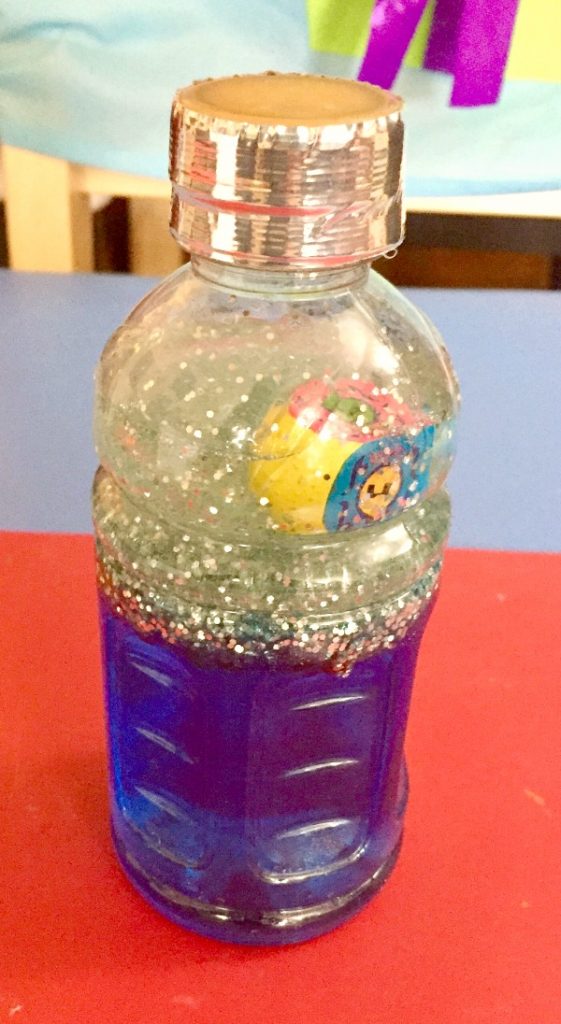
Next add your glitter, dreidel and any other accessories. Screw the cover onto your bottle and secure it with duct tape and/or hot glue (prior to putting the lid on).
As the sensory bottle is shaken, little ones will be able to observe the oil temporarily mingle with the water before separating again and returning to the top!
I Spy 8 Hanukkah Symbols Sensory Bin

Eight is a significant number to the holiday of Hanukkah. The holiday is celebrated for 8 nights to commemorate the miracle of a tiny amount of ritual oil for lighting the Temple menorah lasting for 8 days.

Engage your children in a fun game of I Spy at the sensory table, all the while having them practicing their counting skills as they search for 8 of each Hanukkah themed item hidden under sand and glitter.
Some ideas for objects and symbols to include are dreidels, candles, jugs of oil (I used small plastic trophies), latkes, donuts and coins for gelt.
Hanukkah Writing Sand Trays
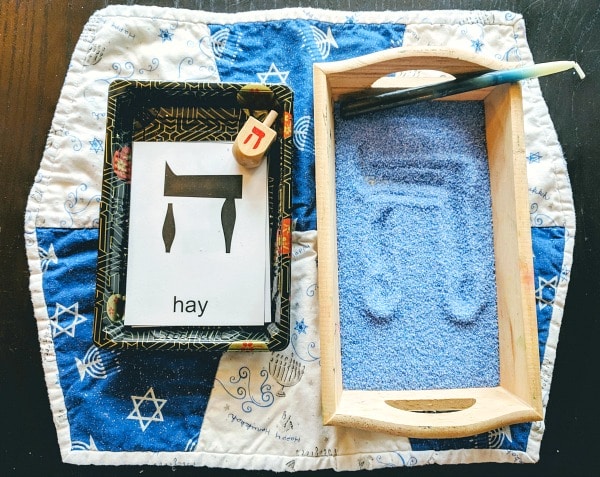
This sensory play activity also includes an element of writing practice. This time, we filled some small trays with colored sand and provided a Hanukkah candle “pen” for writing.
My children used a dreidel to spin and whichever Hebrew letter it landed on, nun, gimmel, hay, or, shin, they practiced writing the letter in the sand.
Alternatively, you can use English letters, or cards with lines and/or simple shapes for pre-writers and early writers.
Hanukkah Math Fun with Counting and Shapes
DIY Counting Latkes Game
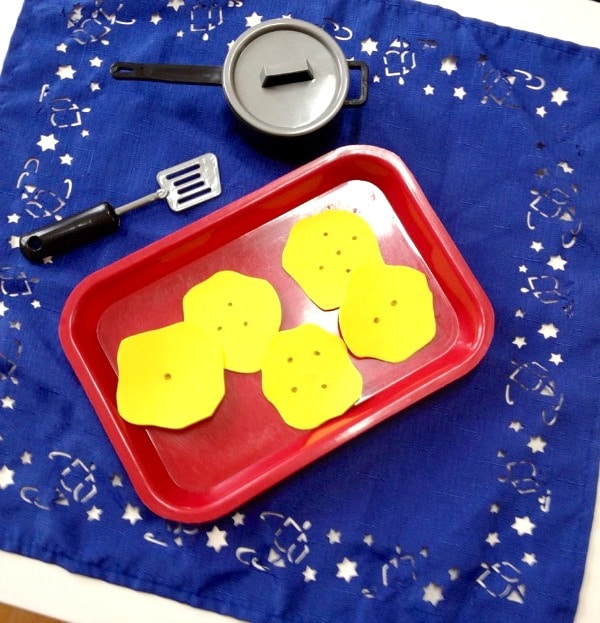
Latkes (fried potato pancakes) are a favorite Hanukkah treat. Little ones love to pretend to fry their own latkes in this fun little game that will have them counting as they chant this adorable little Hanukkah rhyme:
Five Little Latkes
Five little latkes sizzling in the pan
The pan got hot and one went BAM!
Four little latkes sizzling in the pan
The pan got hot and one went BAM!
(continue in descending order to…)
No more latkes sizzling in the pan,
The pan got hot and it went BAM!
To make your own Counting Latkes playset, you’ll need some yellow craft foam or cardboard for your latkes, a toy (or real) frying pan and a toy (or real) metal spatula.
I like to draw dots and/or numerals on each of my play latkes for budding mathematicians.
As you chant the Five Little Latkes rhyme, children can use the spatula to remove the appropriate latke until none are left.
Invitation to Create Magnetic Shape Dreidels

You’ll need magnetic shapes in squares, equilateral triangles and long, skinny rectangles (pro tip: you can use uppercase “I” letter magnets for this).
You’ll also need a magnetic surface. The refrigerator is one option but a metal cookie sheet works just as well.
Invite your little ones to explore geometry as they see if they can build their own dreidel shape from the magnetic shapes provided. You may need to provide a visual example.
Hanukkah Playdough Invitations

Grab your favorite homemade or store-bought playdough and get ready to explore it in some fun new ways this Hanukkah!
- Plastic dreidels are great for making prints in playdough.
- Hanukkah candles are the perfect accessory for playdough menorahs. Alternatively, you can offer straws as “candles.”
- Plastic coins for Hanukkah gelt also make a shiny addition and interesting prints in playdough.
- Cookie cutters and rubber stamps in Hanukkah shapes are a fun addition as well.
- Can you make a dreidel out of clay (or playdough)? This is a fun challenge for little ones to go along with the popular Hanukkah song, “I Have a Little Dreidel.”

Dreidel “Stained Glass” Decoration

You’ll need to cut a dreidel shaped frame from construction paper or card stock. You can freehand it or print a template to trace. Older artists can trace and cut their own frame.
You’ll also need clear contact paper and colorful tissue paper, crepe and/or wrapping paper cut into squares.
Little ones can help with this as well and those who are not yet using scissors can have fun tearing. Place your frame on your contact paper, sticky side up and let young artists stick on the colorful paper.
When you’re done, add a second layer of contact paper sticky side down and cut off any excess before hanging your decoration for all to see!
Hanukkah Art with Loose Parts

This time of year is laden with opportunities to create works of permanent art as we create decorations for our homes and gifts for friends and family. Just as important are opportunities for creative and child-led play and exploration, and what better way to invite little ones of all ages to design, tinker and explore images of Hanukkah than with this invitation to create Hanukkah art with loose parts?
Your loose parts can be comprised of actual holiday artifacts and symbols (like dreidels, candles or coins for gelt) and whatever additional craft and decorative objects you’d like to include. Some good ideas might be craft sticks, beads, sequins, buttons, gems, mosaic tiles, costume jewelry, straws, pipe cleaners and you may want to include a color scheme (blue and white are sometimes popular choices). I like to designate a space for design and I particularly love the use of trays, mirrors, frames, colored paper or even placemats for this. Disposable mirror trays like the ones shown above are often available inexpensively where party supplies are sold
If you’d like to provide elements of inspiration, you can include and combine the elements of being reflective and setting a workspace.
You can provide photos, images, and pictures or sit in with children who may be new to the use of loose parts. I encourage you to also step back once everyone is comfortable and watch the wondrous way children inherently create and design!
Hanukkah Dramatic Play

One of the very best ways for children to learn about a holiday and enjoy it is through play! The Hanukkah story itself is filled with drama and excitement that young children can explore through literacy, storytelling, and playacting.
One of my own children’s favorite themes to play about around Hanukkah is the food!
Every year they look forward to transforming the kitchen set into a Hanukkah themed latke shop and bakery. We get out our toy pots and pans, spatulas, whisks and plenty of dishes for serving up treats.
We stock our kitchen with toy eggs and potatoes, a jug of oil for frying (a recycled bottle filled halfway with vegetable oil and halfway with water, sealed with hot glue and tape and labeled).
I provide some pretend latkes (tree cookies or even craft foam are great for this) and some aprons, chefs hats and potholders for costumes. We also add in pretend cookies, donuts and other sweet treats that are enjoyed this time of year and at any celebration!
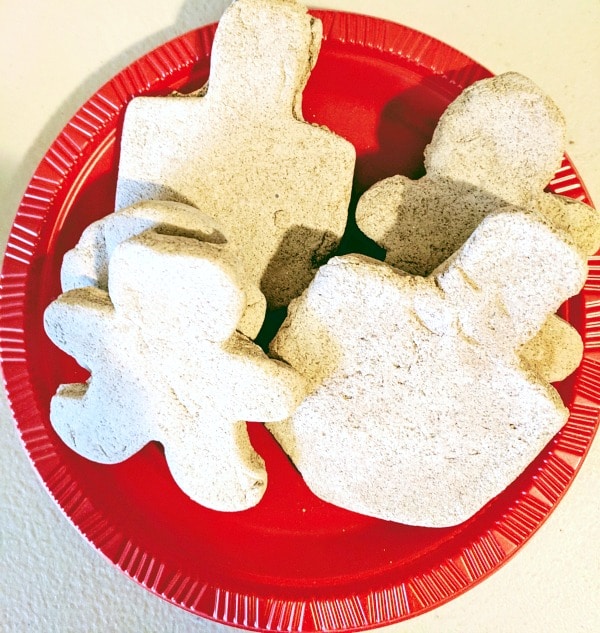
My kids especially love to make their own play props and toy food using air drying clay (Crayola model magic is great), cardboard/paper and even salt dough.
This recipe for Gingerbread Salt Dough is perfect for rolling and cutting your own Hanukkah shaped cookies and gingerbread men to stock your bakery shelves (and fill your play area with the sweet aroma of fresh-baked cookies):
Gingerbread Salt Dough Recipe
You will need:
- 1 cup flour
- 1/2 cup salt
- 1/2 cup cinnamon
- 1 tsp ground ginger
- 3/4 cup warm water
Directions:
- Mix your ingredients well until you have a smooth dough.
- To shape your “cookies,” roll dough about 1/4 inch thick and cut in your favorite shapes with cookie cutters.
- Allow finished cookies to air dry until completely hardened.
- Paint, seal and decorate as you wish.
- To store leftover dough, seal in a plastic bag or container and refrigerate to prolong shelf-life.
Bonus Hanukkah Activities for Preschool
What’s Hanukkah without a present? In these bonus art activities, some of that colorful process art gets put to use in some lovely gifts for friends and family!

Tape Resist Menorah Painting
I’ll admit that although this would have made an amazing gift, we kept it for ourselves!
We used a blank canvas, but you can do this on thick paper or cardstock.
Prepare the paper/canvas with 8 equally sized strips of masking or painters tape and one longer strip in the center for the shamash (helper) candle. Artists can paint or finger paint overtop.
When the paint is dry, an adult can help carefully remove the tape leaving behind the design of a menorah!
For flames, cut flame shapes from some of the process art you have on hand. (We used some painted foil we had from a previous project).
Glue on your flames and you have a festive work of art!

Hand-Menorah T-Shirts
Nothing is cuter than handprint art created by the special little hands in your life. And when it comes to Hanukkah, two hands dipped in paint and placed with thumbs together make the perfect, most adorable handprint menorahs! You can use ink or paint and do this on paper, but it’s even more fun to get out the fabric paints and make your own designer Hanukkah t-shirts! You can even make them as gifts for loved ones.
- To prepare your shirt, I’d recommend sticking a piece of cardboard inside. They make cardboard inserts especially for this purpose (available at craft supply shops) but you can use any piece from your recycling bin!
- To “assemble” your menorahs, have children dip one hand into fabric paint (young ones may need assistance) and check to make sure it is fully covered. You can choose your color.
- Once your hand is ready, place it flat on the t-shirt, fingers evenly spread, thumb in the middle and pinky on the outside. Assist your child in pressing the hand gently to ensure the paint has evenly transferred.
- After wiping down that first hand (I usually keep wipes or wet rags at the table), dip and repeat with the opposite hand, lining up the thumbs from the center.
- Once the paint has dried, you’re ready to add your fingerprint flames. This time have the children dip a thumb or finger into yellow, gold or orange fabric paint and add a flame to each of the “candles” (each finger and one in the conjoined thumbs at the center).
- Alternatively, children can squeeze puffy paint flames and if you wish, you can add a holiday greeting!
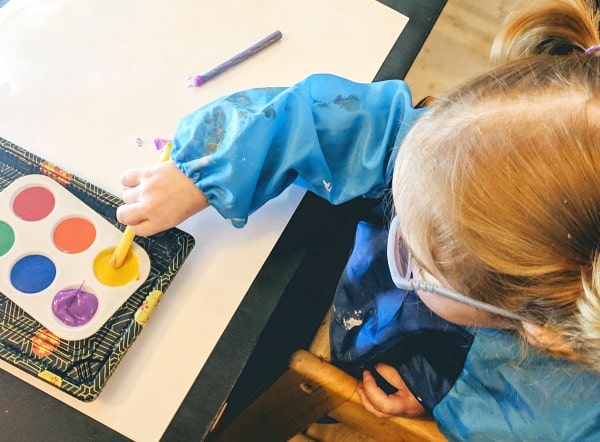
Hanukkah Candle Paintbrushes and Process Art
Painting is fun all year round and unique paintbrushes make for a novel experience. At Hanukkah time, we have fun ditching the traditional paintbrush and swapping in some holiday candles!
It is exciting to paint with the wicks, dab with the flat end, and even to observe the textures and designs of rolling the candle on its side through paint.
Children have a great time exploring with this activity and their finished work can be upcycled into gift wrap or even the final bonus activity below…
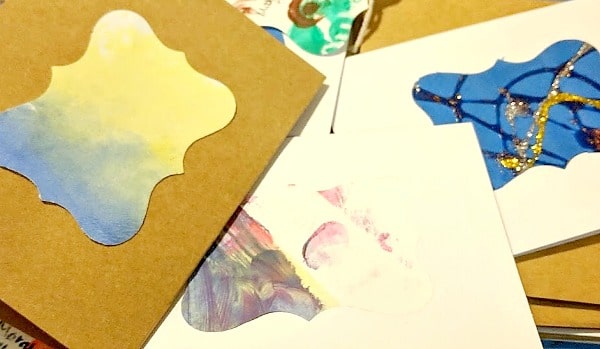
Upcycled Process Art Greeting Cards
Whether you’re sending out holiday greetings, thank you notes or needing a thoughtful gift for a special friend, family member or teacher in your life, these DIY blank greeting cards are a great way to use some of the artwork you created earlier or have leftover.
You can purchase blank greeting card and envelope sets from craft supply stores. I used a large hole punch to create a shape from old artwork but you can also cut by hand.
Young artists will love using large hole punches or helping with the cutting! Glue the art to the center of each card and you’ve got a beautiful work of art ready for gifting.
May your holiday season be bright and filled with joy, fun, and learning!
PRINTABLE HANUKKAH ACTIVITY PACK
Introduce children to more of the traditions and symbols related to Hanukkah with this activity pack. Inside you’ll find whole group, small group, and center activity suggestions and printables for kids ages 3 to 6.

GET YOUR LESSON PLANS

Also available on Teachers Pay Teachers.
Kerri
I happened upon this post looking for ideas on the internet and today my class tried your activity involving the light table with oil and water. It was a hit! Such a blast. We also made the sensory bottle, which are always fun, but I never thought to connect with Hanukkah! You have so many great activities here, I don’t have time for all of them! A great problem to have. It’s a great resource with lots of open ended activities. Thanks for sharing.
Shaunna Evans
Awwww! That’s fantastic to hear! We’re thrilled you were inspired to give some of the ideas and try. So glad the class enjoyed them!
chaya
Thank you for these wonderful activities… Happy Chanukah
Shaunna Evans
So glad you like them! Thank you