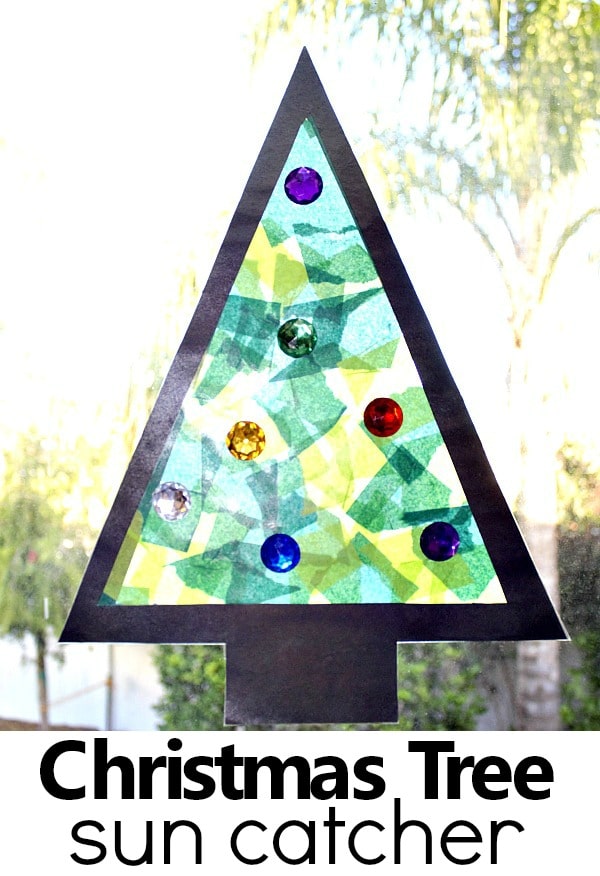
We had so much fun making sun catchers with leaves and pumpkins that we wanted to enjoy a sun catcher this holiday season too. After reading lots of books about Christmas and our recent activity with our sponge painting Christmas tree, we decided to make our sun catchers in the shape of a Christmas tree.
This Christmas tree sun catcher holiday craft is great for artists of all sizes. My toddler and kindergartner thoroughly enjoyed this craft as they sorted and counted jewels, ripped tissue paper to flex those fine motor muscles, and created a beautiful piece of holiday art!

GET A FULL WEEK OF CHRISTMAS THEME ACTIVITIES IN OUR PRINTABLE PRESCHOOL CHRISTMAS LESSON PLANS.
Christmas Tree Sun Catcher Holiday Craft
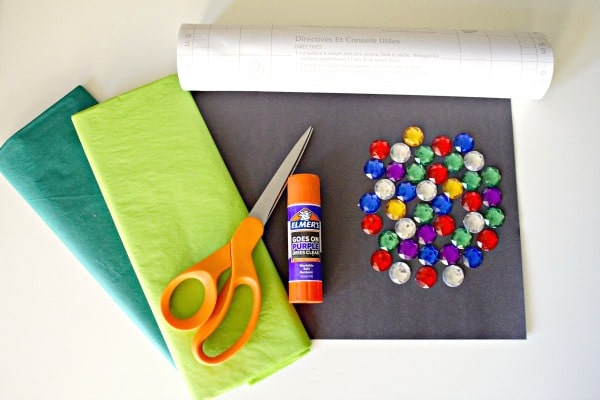
Materials Needed
- Contact paper
- Black construction paper
- Green tissue paper in various shades
- Scissors
- Glue stick
- Colorful plastic gems
How to Make a Christmas Tree Sun Catcher
Watch this short video to see how easy it is to make this Christmas Tree Suncatcher Craft. Then read on for the full directions and extra tips.
The first step in making a Christmas tree sun catcher is to sketch and cut out the shape of a Christmas tree onto black construction paper. We thought back to what we’ve read about Christmas trees coming in all shapes and sizes and it was decided that we would have a tall tree and a shorter more wider one.
The girls helped prepare the tissue paper by tearing the green paper into small squares. To make this process a little easier, I first cut the tissue paper into long strips. This left easily manageable pieces for their little hands. Tearing the tissue paper provides great fine motor practice for little fingers. Listening to each piece of paper rip definitely put smiles on faces.
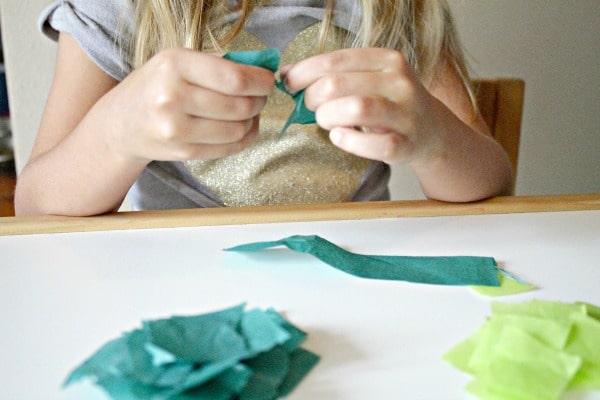
While they were happily ripping the tissue paper, I cut out the trees. Once your outline is cut, you will need to poke a small hole inside the tree and cut inward to make a half inch thick border. Using the tree outlines, I traced a second set to adhere to the back side of the sun catcher. Depending on the size of your tree, you could also opt to simply fold the construction paper in half and then cut once.
Once your paper is prepared, provide two sheets of clear contact paper for each child. We cut our contact paper sheets to be slightly larger than the size of our trees. You will first need to remove the backing of one of the sheets and tape it down to a work space with the sticky side up. We suggest taping down part of the contact paper first, then peeling it off.
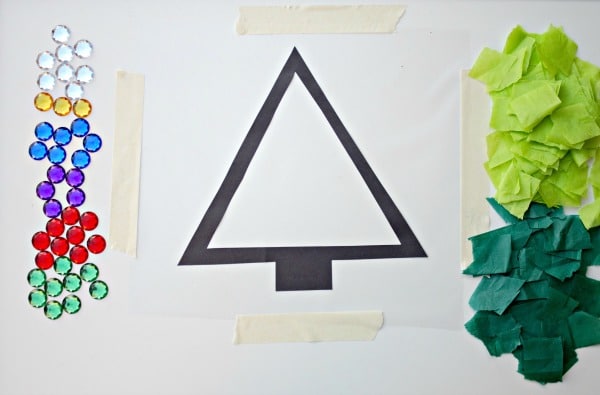
We placed our black tree border on top of the contact paper first. This provided a nice outline for the placement of the tissue paper. Now you can begin arranging the different hues of green tissue squares onto the contact paper. As each piece of paper was stuck down, the girls loved the sticky feeling of the paper under their fingers and watching them bounce off the paper. It turned out to be an added fun sensory experience!
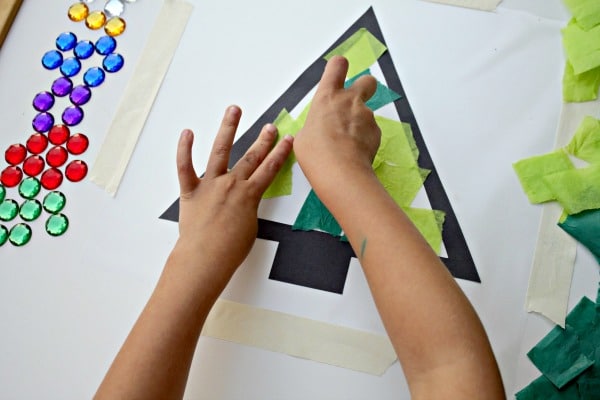
Once the tissue paper has covered the inside of the tree, grab some glue and place the second tree outline on top. Gluing it down definitely helped with any mishaps!
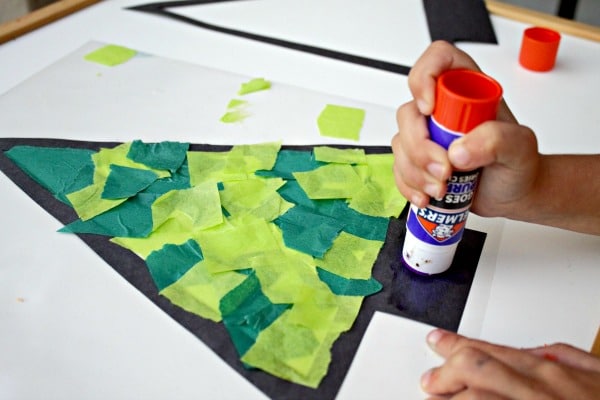
Next, carefully adhere the second layer of contact paper on top to seal it. You will want to do this sticky side down so that the tissue will be completely covered. In the past, we sealed just the tissue paper inside the contact paper and then glued the black border to the outside of the contact paper. I have learned that the border remains more secure and color protected from the heat of windows if you put the border inside the contact paper. You live, you learn!
Now it’s time to cut the excess contact paper off and then decorate! What’s a Christmas tree without ornaments? The final step in creating your Christmas tree sun catcher is to decorate it with jeweled “ornaments.” First we sorted and counted the jewels to add in a little math.
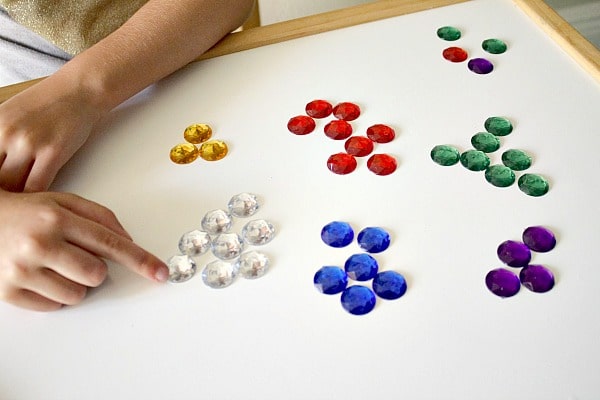
We used glue to place each craft gem onto both sides of our trees so they would sparkle from either way you see them! This step provided extra fine motor practice as they manipulated the small gems between their fingers and glued them to the tree.

We chose a sunny spot in our kitchen to hang them so that they could be admired throughout the holiday season! The girls are excited to have Christmas trees in many different rooms in the house this year. Do you celebrate the holiday season with any special crafts?
More Crafty Christmas Tree Activities
Pom Pom Painted Christmas Trees
Christmas Tree Sponge Painting
Christmas Tree Sun Catcher Holiday Craft
Materials
- Contact paper
- Black construction paper
- Green tissue paper in various shades
- Scissors
- Glue stick
- Colorful plastic gems
Instructions
- Sketch and cut out the shape of a Christmas tree onto black construction paper.
- Cut out the trees. Once your outline is cut, you will need to poke a small hole inside the tree and cut inward to make a half inch thick border.
- Using the tree outlines, I traced a second set to adhere to the back side of the sun catcher. Depending on the size of your tree, you could also opt to simply fold the construction paper in half and then cut once.
- Prepare the tissue paper by tearing the green paper into small squares.
- Once your paper is prepared, provide two sheets of clear contact paper for each child. We cut our contact paper sheets to be slightly larger than the size of our trees.
- Remove the backing of one of the sheets and tape it down to a work space with the sticky side up. We suggest taping down part of the contact paper first, then peeling it off.
- Place your black tree border on top of the contact paper first. This provides a nice outline for the placement of the tissue paper.
- Begin arranging the different hues of green tissue squares onto the contact paper.
- Once the tissue paper has covered the inside of the tree, grab some glue and place the second tree outline on top.
- Next, carefully adhere the second layer of contact paper on top to seal it. You will want to do this sticky side down so that the tissue will be completely covered.
- Cut the excess contact paper off and decorate your tree with jeweled “ornaments.”
- Choose a sunny spot to hang them so that they could be admired throughout the holiday season!
GET A FULL SET OF CHRISTMAS THEME ACTIVITIES
Explore the symbols and traditions of Christmas and incorporate reading, math, science and more in this 169-page preschool secular Christmas lesson plan set full of fun and playful Christmas learning activities for preschool. Watch this short video to see just a few examples of the types of activities and printables included in this set:
The 169-page Christmas Lesson Plan Set includes hands-on activities and these additional printables:
1) Beginning Letters Gift Sorting Game (in color and b/w)
2) Reindeer Math Mats (2 versions in color and b/w)
3) My Christmas Senses Activity Book Making Pieces
4) 0-35 Christmas Number Cards (2 versions in color and b/w)
5) Christmas Counting Syllables Sorting Game (in color and b/w)
6) Christmas Picture-Word Cards (in color and b/w)
7) Ornament Play Dough Mats
8) Candy Cane Play Dough Writing Task Cards (shapes, uppercase letters, lowercase letters, number 0-20)
9) Christmas Light Patterns Activity Pieces (in color and b/w)
Also available on Teachers Pay Teachers.





Cathy
Hi! These look great! I’m curious, how did you attach them to the window? Thanks!
Shaunna Evans
Thanks! I think I just used small bits of clear tape rolled and attached to the black outline. They are relatively light so it doesn’t take much. However, you could also use clear sticky tack or reusable clear sticky dots.